New Laptop or Phone? Complete Cybersecurity Checklist Before You Go Online (2026)
You just unboxed your new laptop or phone. The screen is pristine. The battery is at 80%. You're excited to set it up, install your apps, and get back to work. Stop. The next 30 minutes are the most important security window this device will ever have. Every setting you accept, every account you connect, and every app you install during initial setup creates a security baseline that will persist for the entire life of the device. Get it wrong now, and you'll spend months patching holes you didn't know you created. Get it right, and this device will be more secure than 90% of the machines on your network. This is a sequential checklist. Follow it in order, during your first setup session, before you connect to any untrusted network or install any non-essential software. Each step takes 1–5 minutes. The entire process takes roughly 30–45 minutes. For the foundational concepts behind these steps (why passwords matter, how phishing works, what MFA does), see our Cybersecurity for Beginners guide. This article focuses purely on the hands-on setup process. Phase 1: Before You Connect to the Internet These steps happen during the out-of-box experience (OOBE), before your device touches the internet. This is critical because an unpatched device connected to a network is immediately discoverable by automated scanners. Step 1: Inspect the Physical Device and Packaging Before powering on, verify that the packaging seal was intact when you received it. If the shrink wrap was broken, the box was resealed, …
You just unboxed your new laptop or phone. The screen is pristine. The battery is at 80%. You’re excited to set it up, install your apps, and get back to work.
Stop.
The next 30 minutes are the most important security window this device will ever have. Every setting you accept, every account you connect, and every app you install during initial setup creates a security baseline that will persist for the entire life of the device.
Get it wrong now, and you’ll spend months patching holes you didn’t know you created. Get it right, and this device will be more secure than 90% of the machines on your network.
This is a sequential checklist. Follow it in order, during your first setup session, before you connect to any untrusted network or install any non-essential software. Each step takes 1–5 minutes. The entire process takes roughly 30–45 minutes.
For the foundational concepts behind these steps (why passwords matter, how phishing works, what MFA does), see our Cybersecurity for Beginners guide. This article focuses purely on the hands-on setup process.
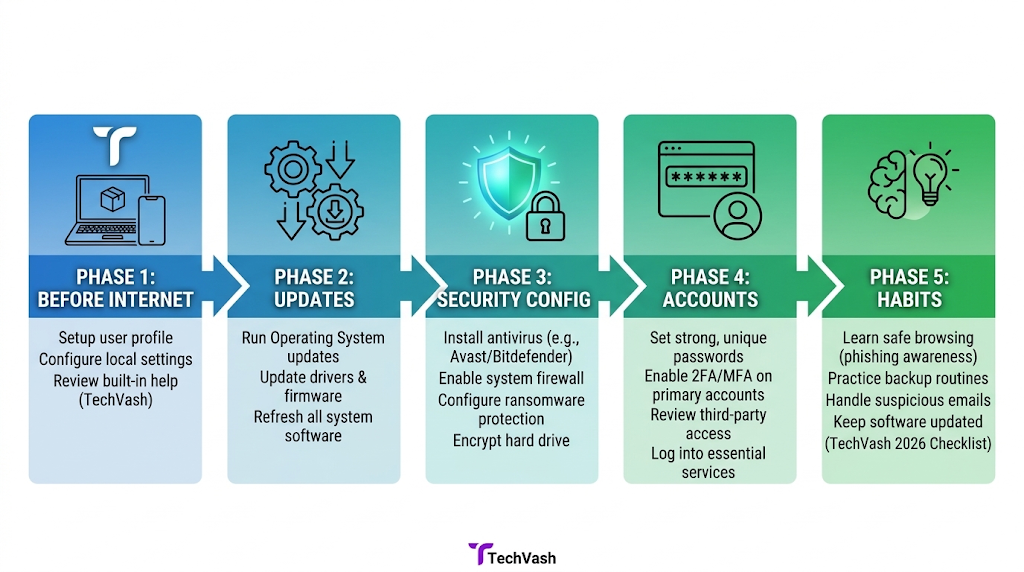
Phase 1: Before You Connect to the Internet
These steps happen during the out-of-box experience (OOBE), before your device touches the internet. This is critical because an unpatched device connected to a network is immediately discoverable by automated scanners.
Step 1: Inspect the Physical Device and Packaging
Before powering on, verify that the packaging seal was intact when you received it. If the shrink wrap was broken, the box was resealed, or the device shows signs of prior activation, return it. Supply chain tampering, where malicious hardware or firmware is inserted before the device reaches you, is rare for consumer purchases but increasingly documented in 2026, particularly for devices ordered from third-party marketplace sellers rather than authorized retailers.
Action: Buy directly from the manufacturer or an authorized retailer. If the packaging looked suspicious, don’t risk it.
Step 2: Power On and Decline Data Sharing Prompts
During initial setup, both Windows 11 and macOS will ask you to enable telemetry, diagnostics, and “personalized experiences.” Android and iOS will prompt you to share usage data with Google or Apple.
Decline all of them. You can always enable specific features later if needed. The default “yes to everything” approach sends device identifiers, usage patterns, location data, and crash reports to the manufacturer and their partners before you’ve had a chance to evaluate what you’re sharing.
Windows 11: Choose “No” on the diagnostic data screen. Select “Basic” if “No” isn’t available. macOS: Uncheck “Share Mac Analytics” and “Share with App Developers” in System Settings > Privacy & Security. Android: Skip “Help improve Android” and decline Google’s personalized ad ID during setup. iOS: Choose “Don’t Share” when prompted for analytics sharing.
Step 3: Create a Local Account First (Laptops)
Windows 11 aggressively pushes you to sign in with a Microsoft account during OOBE. While a Microsoft account enables cloud sync and some convenience features, it also links your device identity to your online profile and enables data synchronization before you’ve configured your security settings.
Recommended approach: Create a local account first. Complete all security configurations. Then, if you want Microsoft account integration, sign in afterward with your security settings already in place.
How to bypass the Microsoft account requirement in Windows 11 (2026): During the network connection screen, press Shift + F10 to open Command Prompt. Type OOBE\BYPASSNRO and press Enter. The device will restart and offer a “I don’t have internet” option, allowing local account creation.
macOS: Apple allows local account creation by default during setup. Simply create your user account without signing into iCloud initially.
Step 4: Set a Strong Device Passcode or Password
Your device’s login credential is the first line of defense against physical access. If someone steals your laptop or phone, this is the only thing standing between them and your data.
Laptops: Set a password of at least 14 characters. Use a passphrase (four random words separated by spaces or hyphens) rather than a complex string you’ll forget. Do not use your Microsoft or Apple account password.
Phones: Set a 6-digit PIN minimum. An alphanumeric passcode is stronger but less practical for frequent unlocking. Avoid pattern locks on Android — they’re easily observed and replicated from smudge marks on the screen.
Critical: Do this before enabling biometrics. Biometrics (fingerprint, face recognition) are a convenience layer on top of your passcode, not a replacement. Your device will require the passcode after restarts, after 72 hours of inactivity, and during security-sensitive operations.
Phase 2: First Connection and Updates
Step 5: Connect to a Trusted Network Only
Connect to your secured home Wi-Fi — not a public network, not a hotel network, not a coffee shop. Your device is about to download gigabytes of updates, and you want that traffic on a network you control.
If you’re setting up the device away from home, use your phone’s cellular hotspot instead of public Wi-Fi. The cellular connection is encrypted and far more difficult to intercept.
Step 6: Run All Operating System Updates Immediately
Before installing any apps, connecting any accounts, or configuring any settings, update the operating system to the latest available version.
Why this is step one: Your new device may have been manufactured weeks or months ago. The OS version installed at the factory likely has known vulnerabilities that have since been patched. Connecting to the internet with an unpatched OS exposes you to exploits that automated scanners actively probe for.
Windows 11: Settings > Windows Update > Check for updates. Install everything, restart, and repeat until no updates remain. This may require 2–3 restart cycles. macOS: System Settings > General > Software Update. Install all available updates. Android: Settings > System > Software update. Note that Android update availability depends on your device manufacturer and carrier — some budget phones ship with OS versions that are already 6–12 months behind. iOS: Settings > General > Software Update. iPhones typically ship with relatively current iOS versions, but always verify.
Do not skip this step. Everything else on this checklist is less effective if your OS has unpatched vulnerabilities.
Step 7: Update All Pre-Installed Applications
After the OS is current, update every pre-installed application. Laptops ship with OEM software (Dell SupportAssist, HP Support Assistant, Lenovo Vantage) and bundled utilities that often have their own update mechanisms. Phones ship with carrier apps and manufacturer overlays that may have known vulnerabilities.
Windows: Open the Microsoft Store > Library > Get updates. Then open each OEM utility and check for firmware and driver updates. macOS: Open the App Store > Updates. Also check for firmware updates in System Settings > General > Software Update. Android/iOS: Open the Play Store or App Store > Manage apps > Update all.
Phase 3: Security Configuration
Step 8: Enable Full-Disk Encryption
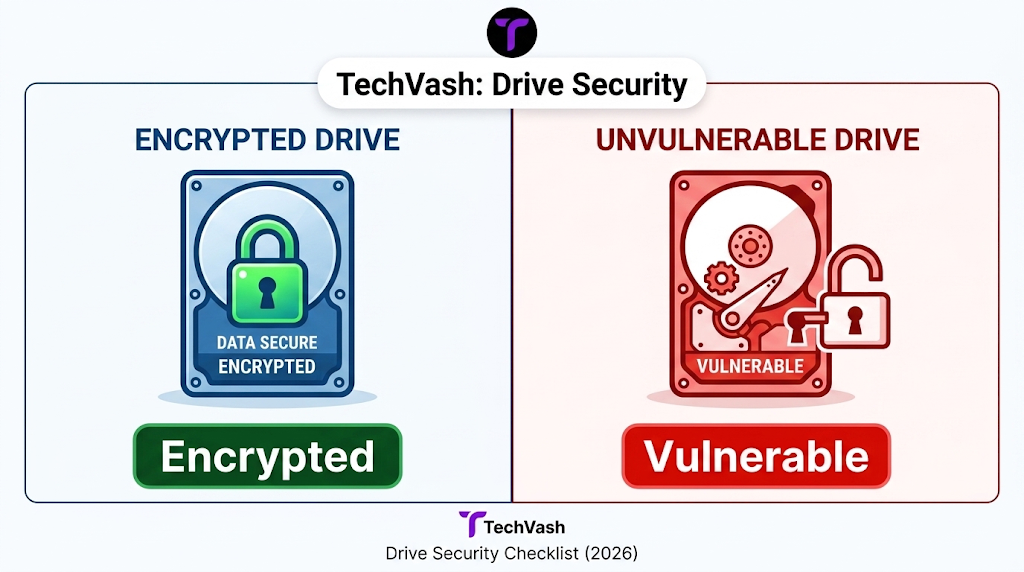
Full-disk encryption ensures that if your device is lost or stolen, the data on its storage drive is unreadable without your passcode. Without encryption, a thief can remove the storage drive, connect it to another computer, and read all your files.
Windows 11:
BitLocker (Pro/Enterprise editions): Search “BitLocker” in the Start menu and enable it for your system drive. Save the recovery key to a secure location (your password manager or a printed copy stored in a safe — not a text file on the same device).
Device Encryption (Home edition): Settings > Privacy & Security > Device encryption. This is a simplified version of BitLocker that’s available on most modern Windows 11 Home devices with a TPM 2.0 chip.
macOS: System Settings > Privacy & Security > FileVault. Turn it on. This encrypts your entire startup disk. Save the recovery key securely.
Android: Encryption is enabled by default on all devices running Android 10+. Verify in Settings > Security > Encryption & credentials. If it says “Encrypted,” you’re covered.
iOS: Encryption is automatic when a passcode is set. No additional action required.
Step 9: Enable Biometric Authentication
Now that your passcode and encryption are configured, enroll your biometrics for convenience.
Windows 11: Settings > Accounts > Sign-in options. Set up Windows Hello Face (if your laptop has an IR camera) or Windows Hello Fingerprint (if your device has a fingerprint reader).
macOS: System Settings > Touch ID & Password. Enroll at least two fingerprints.
Android: Settings > Security > Biometrics. Enroll your fingerprint and/or face unlock. Note that face unlock on many Android devices uses the front camera (2D) rather than a depth sensor, making it less secure than fingerprint. Use fingerprint as your primary biometric.
iOS: Settings > Face ID & Passcode (or Touch ID & Passcode). Complete enrollment.
Important: Biometrics are convenient but not infallible. Your passcode remains the master credential. Law enforcement in many U.S. jurisdictions can compel biometric unlocking (fingerprint or face) but cannot legally compel you to reveal a passcode. If this concerns you, disable biometrics before crossing borders or entering sensitive legal situations.
Step 10: Configure the Built-In Firewall
Windows 11: Windows Defender Firewall is enabled by default, but verify it’s active for all network profiles (Domain, Private, Public). Search “Windows Defender Firewall” in the Start menu and confirm all three profiles show “On.” Set your home network to “Private” and all other networks to “Public” by default.
macOS: The built-in firewall is disabled by default. Enable it in System Settings > Network > Firewall. Turn on “Block all incoming connections” for maximum protection, or use the default “Automatically allow built-in software to receive incoming connections” for a balance of security and convenience.
Android/iOS: Mobile operating systems handle firewall functions at the OS level. No user configuration is needed.
Step 11: Set Up Find My Device and Remote Wipe
If your device is lost or stolen, you need the ability to locate it, lock it, or erase its data remotely.
Windows 11: Settings > Privacy & Security > Find my device. Turn it on. This requires a Microsoft account linked to the device.
macOS: System Settings > Apple ID > iCloud > Find My Mac. Enable it. This requires an Apple ID.
Android: Settings > Security > Find My Device. Ensure it’s enabled and linked to your Google account.
iOS: Settings > Apple ID > Find My > Find My iPhone. Enable “Find My network” (allows location tracking even when the device is offline or powered down on iPhone 11 and later) and “Send Last Location” (sends the device’s location to Apple when the battery is critically low).
Critical: After enabling Find My Device, test the remote lock feature from another device or a web browser. Verify that you can actually locate and lock the device before you need it in an emergency.
Phase 4: Account and App Setup
Step 12: Install a Password Manager Before Creating Any Accounts
Before you start signing into email, cloud storage, social media, and work tools, install your password manager. This ensures that every account you set up on the new device gets a unique, strong password from the start — rather than defaulting to reused passwords out of convenience.
Action: Install the password manager app and browser extension. Log in with your master password. Verify that autofill is working in your browser before proceeding.
Step 13: Enable MFA on Every Account You Connect
As you sign into each account on your new device, enable multi-factor authentication if it isn’t already active. Prioritize these accounts:
Email (your master key to password resets)
Cloud storage (OneDrive, Google Drive, iCloud)
Financial accounts (banking, payment apps)
Work tools (Slack, Microsoft 365, CRM)
Social media
Use an authenticator app or passkeys rather than SMS codes.
Step 14: Audit App Permissions Before Installing
When you install apps on your new device, each one will request permissions — camera, microphone, location, contacts, storage, notifications. The default impulse is to tap “Allow” on everything to get past the prompts quickly. Resist this.
The principle of least privilege: Grant each app only the permissions it needs to function. A calculator app doesn’t need access to your contacts. A weather app doesn’t need your precise location 24/7. A note-taking app doesn’t need microphone access.
Android: Settings > Privacy > Permission manager. Review each permission category and revoke access for apps that don’t need it. Use “Allow only while using the app” for location and camera permissions whenever possible.
iOS: Settings > Privacy & Security. Review each permission category. iOS 17+ provides a visual indicator (colored dots in the status bar) when an app is using your camera or microphone.
Windows 11: Settings > Privacy & Security. Review app permissions for camera, microphone, location, and file system access.
macOS: System Settings > Privacy & Security. Review which apps have access to Full Disk Access, Accessibility, Screen Recording, and other sensitive permissions.
Step 15: Remove Bloatware and Unnecessary Pre-Installed Apps
New devices ship with pre-installed software you didn’t ask for and don’t need. On Windows laptops, this includes trial antivirus programs (McAfee, Norton), manufacturer utilities, promotional apps, and browser toolbars. On Android phones, it includes carrier apps, manufacturer overlays, and sponsored games.
Why this matters: Every installed application is a potential attack surface. Bloatware runs background processes, consumes system resources, and may contain vulnerabilities that attackers can exploit. In 2026, several pre-installed Android apps from major manufacturers were discovered to contain adware and data-harvesting code that operated without user consent.
Windows 11: Settings > Apps > Installed apps. Uninstall everything you don’t recognize or need. Pay special attention to trial antivirus programs — they often conflict with Windows Defender and create security gaps during the transition period.
macOS: Open Finder > Applications. Drag unnecessary apps to Trash. macOS ships with relatively little bloatware, but check for third-party utilities you don’t need.
Android: Settings > Apps. Disable or uninstall carrier and manufacturer apps you don’t use. Some pre-installed apps can’t be fully removed without rooting the device, but you can disable them to prevent background activity.
iOS: Long-press app icons and remove apps you don’t need. iOS has minimal bloatware, but remove any pre-installed apps you won’t use (Stocks, Tips, Podcasts, etc.) to reduce the attack surface.
Phase 5: Ongoing Security Habits
Step 16: Configure Automatic Updates for Everything
You updated the OS and apps during setup. Now ensure they stay updated automatically going forward.
Windows 11: Windows Update is automatic by default. Verify that “Receive updates for other Microsoft products” is enabled in Advanced options. Set active hours so updates don’t restart your device during work.
macOS: System Settings > General > Software Update > Automatic Updates. Enable “Install macOS updates” and “Install application updates from the App Store.”
Android: Settings > System > Software update > Auto download over Wi-Fi. Also enable auto-update for apps in the Play Store.
iOS: Settings > General > Software Update > Automatic Updates. Enable both “Download iOS Updates” and “Install iOS Updates.” Enable App Store auto-updates in Settings > App Store.
Step 17: Set Up Your Backup
Configure your backup solution during initial setup while your device is still clean and organized. Waiting until you’ve accumulated months of data means your first backup will take hours and you’ll have no recovery point if something goes wrong in the meantime.
Step 18: Create a Recovery Key and Store It Securely
Your device encryption, password manager, and cloud accounts all have recovery keys or backup codes. If you lose access to your primary authentication method, these keys are the only way to recover your data.
Action: Write down or print the following recovery keys and store them in a physical safe or a secure offline location:
BitLocker/FileVault recovery key
Password manager master recovery code
MFA backup codes for your email and primary accounts
Apple ID or Google Account recovery codes
Do not store these keys on the device they protect. Do not store them in a cloud note that requires the same account to access. A printed copy in a fireproof safe is the most reliable option.
Quick-Reference Checklist
Print this or screenshot it for your next device setup:
#
Step
Time
1
Inspect packaging and device
1 min
2
Decline data sharing prompts
2 min
3
Create local account first
2 min
4
Set strong device passcode
1 min
5
Connect to trusted network only
1 min
6
Run all OS updates
10–20 min
7
Update pre-installed apps
5 min
8
Enable full-disk encryption
2 min
9
Enroll biometrics
2 min
10
Configure firewall
2 min
11
Set up Find My Device
2 min
12
Install password manager
3 min
13
Enable MFA on all accounts
5–10 min
14
Audit app permissions
3 min
15
Remove bloatware
3 min
16
Configure automatic updates
2 min
17
Set up backup
5 min
18
Store recovery keys securely
5 min
Total
~45 min
Frequently Asked Questions
Should I install a third-party antivirus on my new Windows laptop?
Not immediately. Windows Defender is active by default and provides strong baseline protection. Installing a third-party antivirus alongside Defender can cause conflicts and performance issues. If you decide to use a paid security suite, uninstall any trial antivirus that came pre-installed (McAfee, Norton) first, then install your chosen solution. For a detailed comparison, see our Is Free Antivirus Enough? guide.
Is it safe to restore from a backup of my old device?
It depends on the security state of your old device. If your previous device was well-maintained with current updates and no known infections, restoring from its backup is generally safe. If your old device was compromised, outdated, or loaded with bloatware, you’re importing all those problems onto your clean new device. When in doubt, set up the new device fresh and selectively transfer only the files you need.
Should I enable cloud sync during initial setup?
Delay cloud sync until after you’ve completed this checklist. Enabling OneDrive, iCloud, or Google Drive sync during OOBE means your device immediately begins uploading files to the cloud before you’ve configured encryption, permissions, and security settings. Set up cloud sync as the final step after everything else is locked down.
How do I securely dispose of my old device after setting up the new one?
Perform a factory reset with data erasure. On Windows, use “Reset this PC” with the “Remove everything” and “Clean the drive” options. On macOS, use Erase All Content and Settings (Apple Silicon) or Disk Utility to securely erase the drive (Intel). On Android, use Factory Data Reset with the “Erase all data” option. On iOS, use Erase All Content and Settings. Remove the device from your Find My Device account and revoke its access tokens from your password manager and MFA settings.
Do I need to repeat this process for every new device?
Yes. Every new device — whether it’s a replacement laptop, a new phone, a tablet for your child, or a work-issued machine — should go through this checklist. The specific steps vary slightly by operating system, but the principles are identical: update first, encrypt, lock down, then connect.